Launch pipelines
This tutorial provides an introduction to Seqera Platform, including instructions to:
- Launch, monitor, and optimize the nf-core/rnaseq pipeline
- Select pipeline input data with Data Explorer and Platform datasets
- Perform tertiary analysis of pipeline results with Data Studios
The Platform Community Showcase workspace contains all the resources needed to follow along with this tutorial. All Seqera Cloud users have access to this example workspace by default.
The Launchpad in every Platform workspace allows users to easily create and share Nextflow pipelines that can be executed on any supported infrastructure, including all public clouds and most HPC schedulers. A Launchpad pipeline consists of a pre-configured workflow repository, compute environment, and launch parameters.
The Community Showcase contains 15 preconfigured pipelines, including nf-core/rnaseq, a bioinformatics pipeline used to analyze RNA sequencing data.
The workspace also includes three preconfigured AWS Batch compute environments to run Showcase pipelines, and various Platform datasets and public data sources (accessed via Data Explorer) to use as pipeline input.
To skip this Community Showcase tutorial and start running pipelines on your own infrastructure:
- Create an organization and add members.
- Create a workspace and add workspace participants.
- Create a workspace compute environment for your cloud or HPC compute infrastructure.
- Add pipelines to your workspace.
Launch the nf-core/rnaseq pipeline
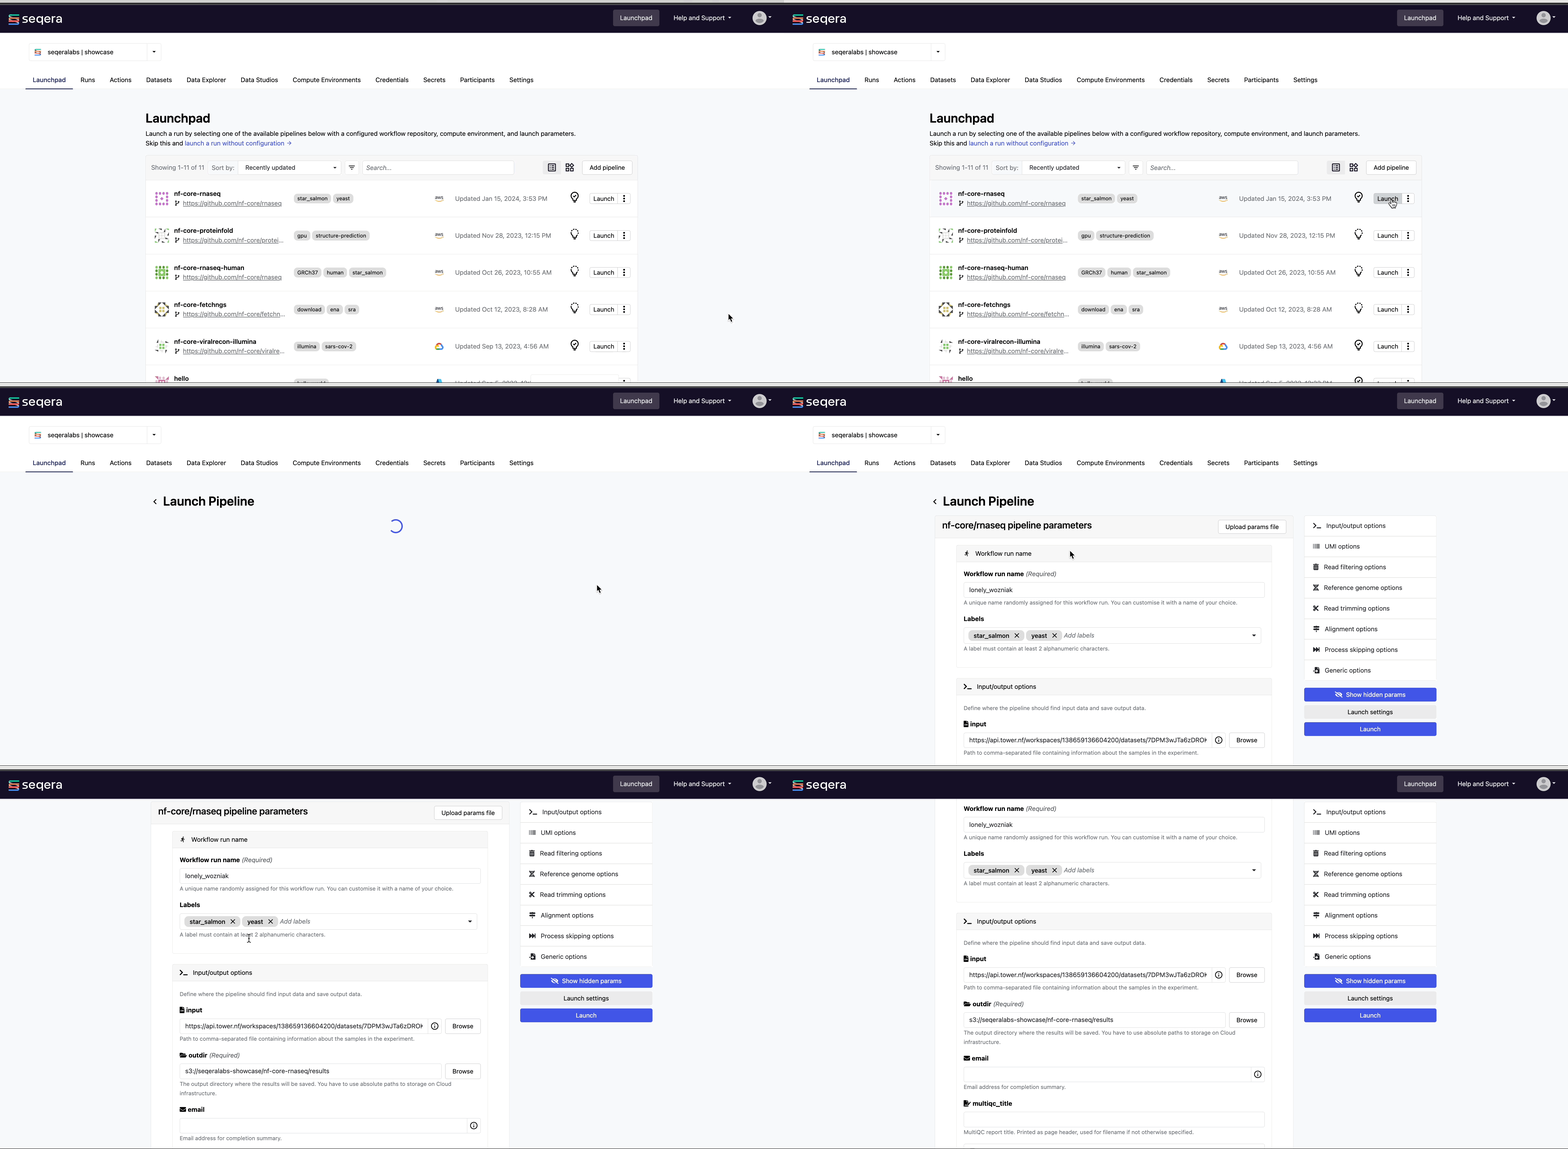
Navigate to the Launchpad in the community/showcase workspace and select Launch next to the nf-core-rnaseq pipeline to open the launch form.

Nextflow parameter schema
The launch form lets you configure the pipeline execution. The pipeline parameters are rendered from a pipeline schema file in the root of the pipeline Git repository. nextflow_schema.json is a simple JSON-based schema describing pipeline parameters for pipeline developers to easily adapt their in-house Nextflow pipelines to be executed in Platform.
See Best Practices for Deploying Pipelines with the Seqera Platform to learn how to build the parameter schema for any Nextflow pipeline automatically with tooling maintained by the nf-core community.
Parameter selection
Adjust the following Platform-specific options:
Workflow run name: A unique identifier for the run, pre-filled with a random name. This can be customized.Labels: Assign new or existing labels to the run. For example, a project ID or genome version.
Each pipeline requires a set of parameters to run:
input
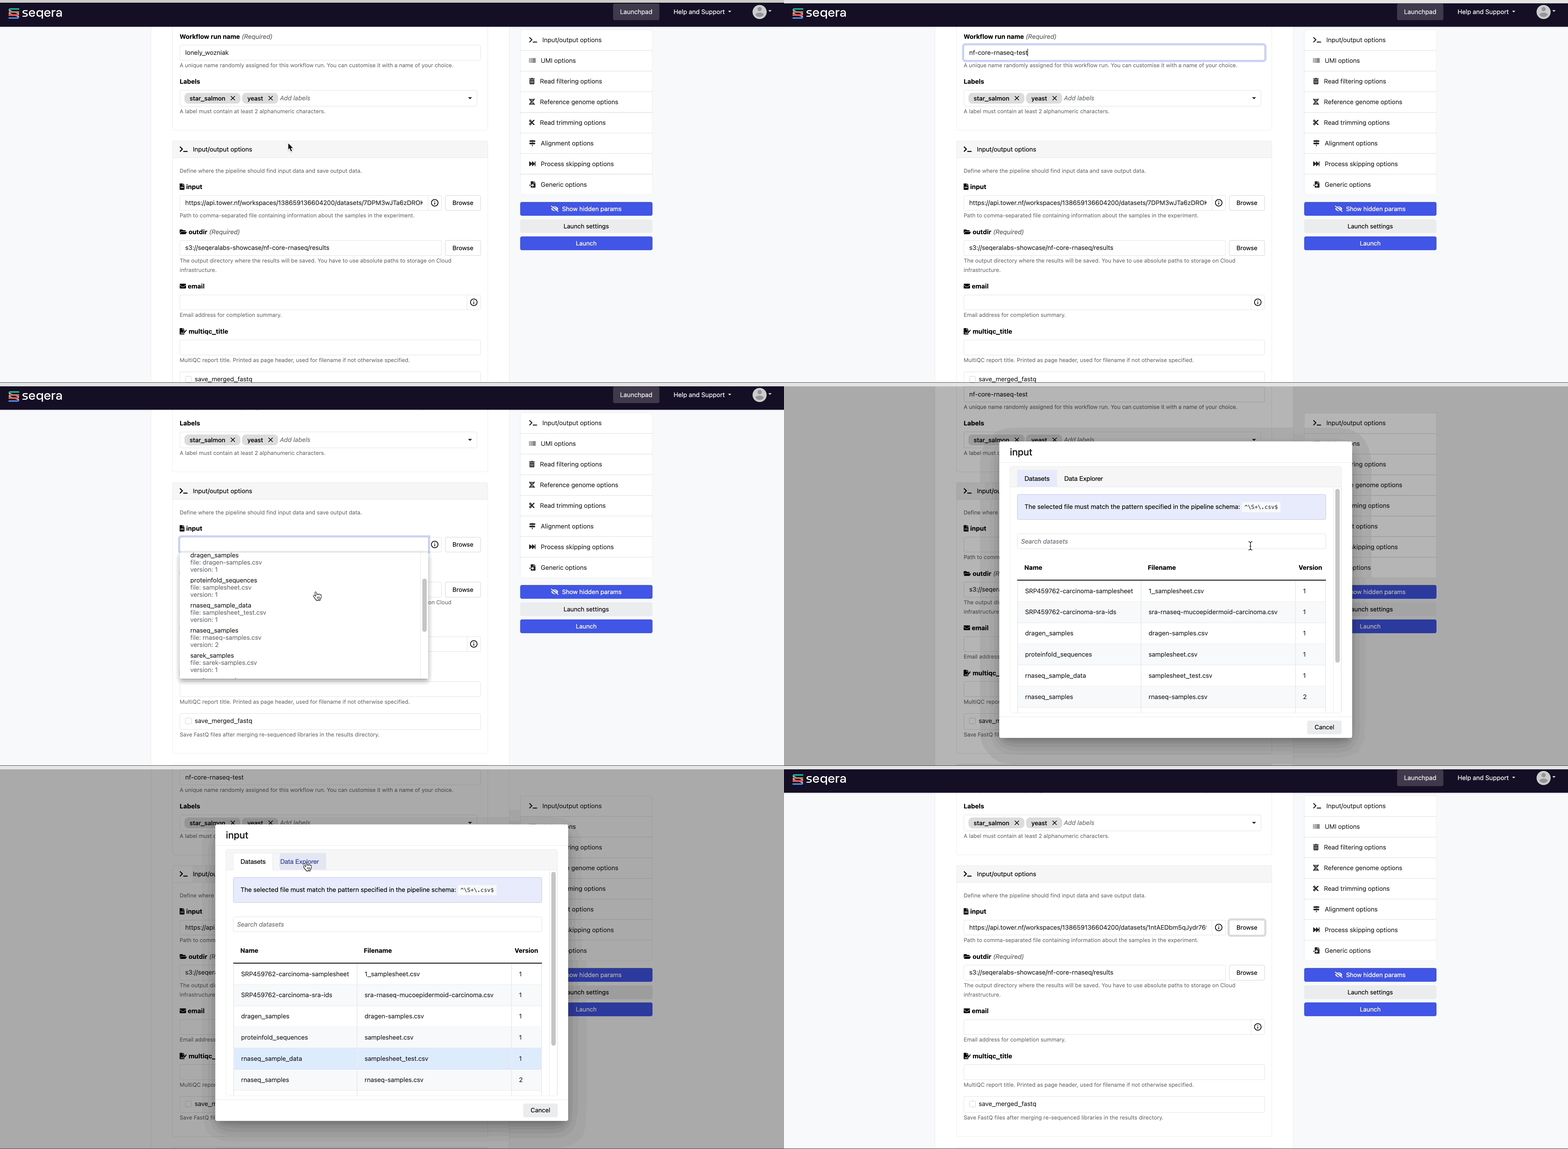
Most nf-core pipelines use the input parameter in a standardized way to specify an input samplesheet that contains paths to input files (such as FASTQ files) and any additional metadata needed to run the pipeline. Use Browse to select either a file path in cloud storage via Data Explorer, or a pre-loaded Dataset:
Data Explorer
In the Data Explorer tab, select the nf-tower-data bucket, then search for and select the rnaseq_sample_data.csv file.
Datasets
In the Datasets tab, search for and select rnaseq_sample_data.

- See Add data to upload your own samplesheet datasets, and add private and public cloud storage buckets to your workspace.
output
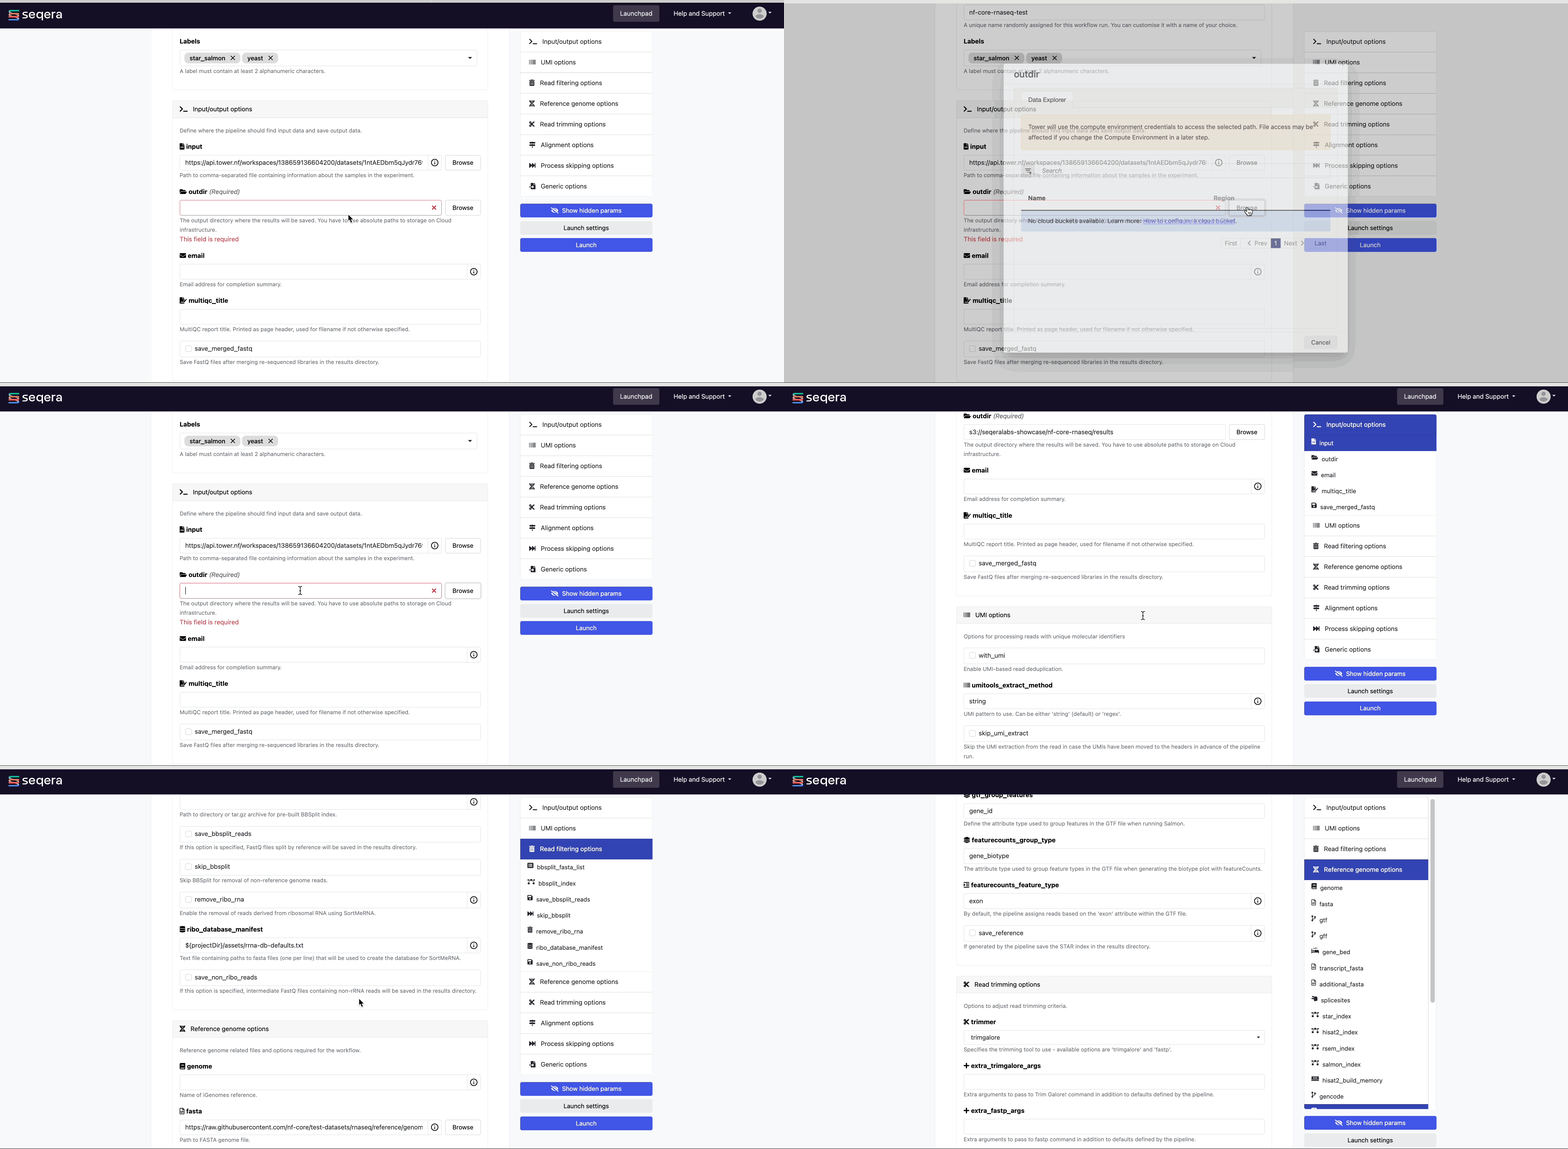
Most nf-core pipelines use the outdir parameter in a standardized way to specify where the final results created by the pipeline are published. outdir must be unique for each pipeline run. Otherwise, your results will be overwritten.
For this tutorial test run, keep the default outdir value (./results).
For the outdir parameter in pipeline runs in your own workspace, select Browse to specify a cloud storage directory using Data Explorer, or enter a cloud storage directory path to publish pipeline results to manually.

Pipeline-specific parameters
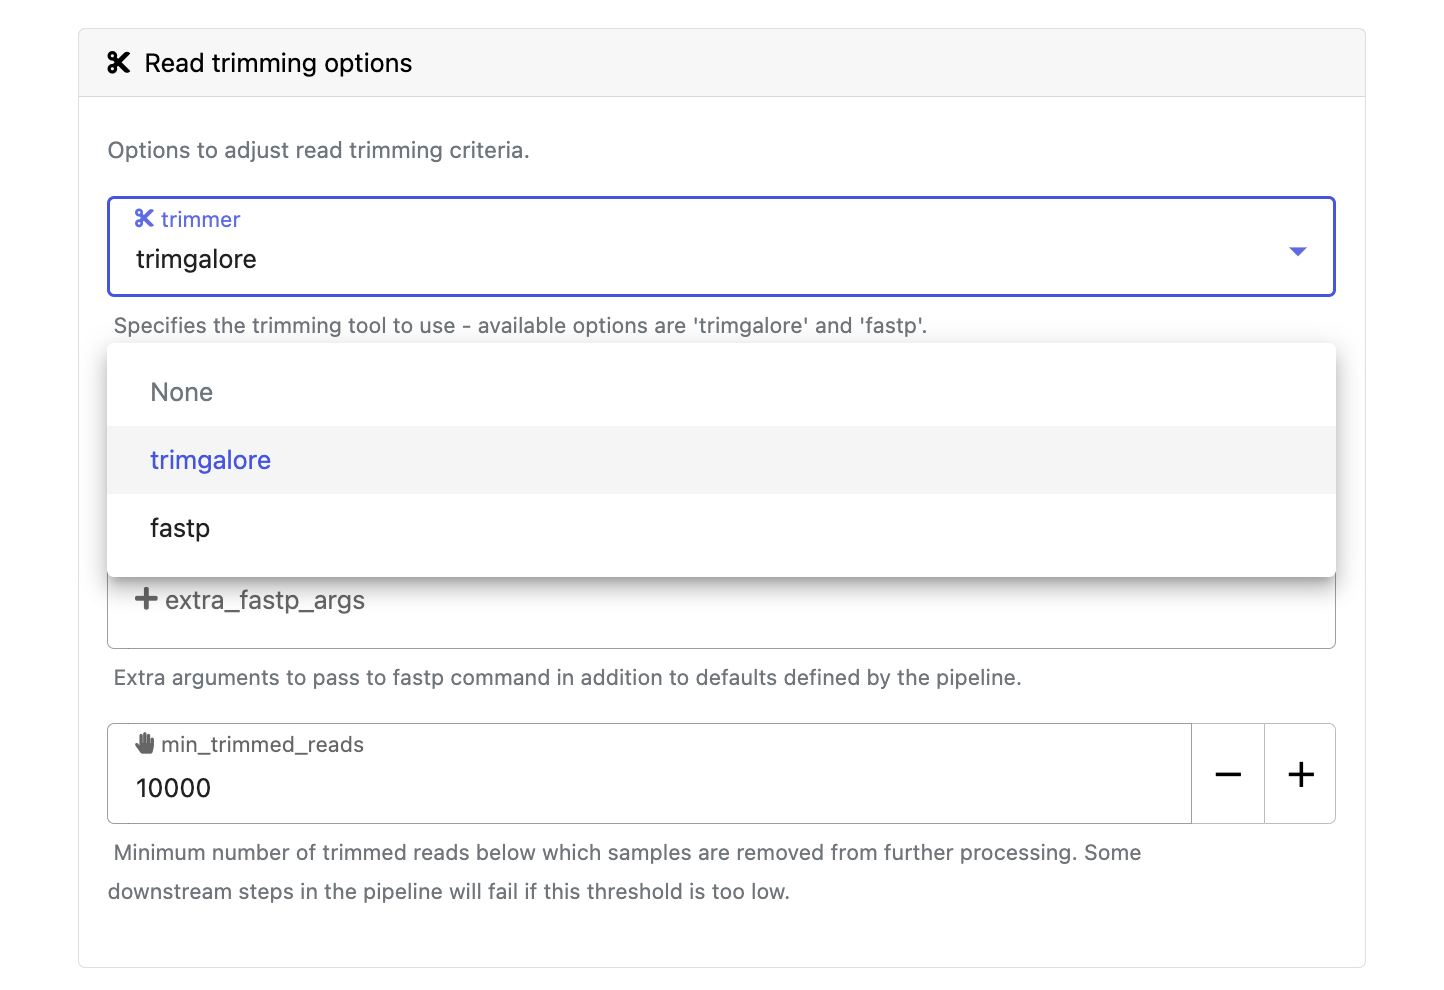
Modify other parameters to customize the pipeline execution through the parameters form. For example, under Read trimming options, change the trimmer to select fastp in the dropdown menu instead of trimgalore.

Select Launch to start the run and be directed to the Runs tab with your run in a submitted status at the top of the list.